Monday 28 July 2014

HOW TO GROW GIANT SUNFLOWERS


My son George grew his first sunflower this year (he is only two after all).  We entered it in to a local competition for the largest sunflower grown by a child and he won first place. 

I am not surprised, as it is a fantastic plant with huge leaves and a thick stalk.  It came from a seed we were given at RHS Wisley as part of their sunflower event.

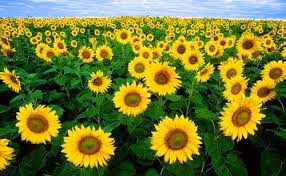
Sunflowers are  hardy annuals, so you will have to plant from seed every year. The key to growing large sunflowers (Helianthus annus) is to select a good seed.  You will not get a large sunflower from a seed from a small sunflower variety.  You need to select a giant single sunflower variety. You can tell it’s a giant variety from the size of the seed as these seeds are big, between 2 - 3 cm long.

Sow your seeds into a pot in the spring, rather than outside, to ensure and early summer, or a little earlier in pots. The advantage of growing them in a pot is that they get a chance to get established quicker, and every advantage to grow them bigger needs to be taken.  

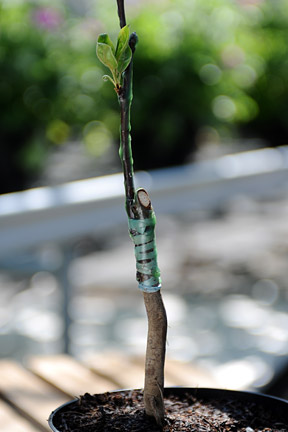
Sow into individual 7.5 cm / 3 inch pots.  Fill the pot up with multi purpose compost and drop the seed in pointy tip upwards a 1/4 inch into the soil.  Water gently and place in a sunny position of 20-30 C (a sunny windowsill will do).  Germination will take about 21 days. 

Plant out in the border when the  risk of frost has passed. Choose a sunny position suitable for your sunflower; and one that is a little sheltered or your sunflower may be blown over. Tie your sunflower into a cane when they grow to prevent them from being blown over.

Feed weekly with a liquid fertiliser and water daily during the summer. Your sunflowers will flower in late summer.  Georges award winning sunflower was in bloom at the end of July and it measured  2.68 m / nearly nine foot tall.


Wednesday 23 July 2014

NYMANS: THE SUMMER BORDERS


Click here for the 'Seeds of Eaden' seed shop

Nymans gardens are located in the heart of the Sussex Weald.  The estate consists of over 600 acres which includes 300 acres of farmland, 275 acres of woodland and 33 acres of formal gardens.


The famous Summer Borders at Nymans are one of the highlights of the gardens. Located within the walled garden and amongst a dramatic backdrop of topiary yew these old herbaceous borders were updated to include annuals, perennials, shrubs and grasses. 

These double borders have a bright colour range and a long flowering period, and contrast with the more muted tones of the preceding June border. As their names suggests the borders are at their peak in July and August, but flowering lasts until the first frost in October/November.

The borders are planted out in four rows, to give a graduation of heights from tall at the back of the border to shorter plants at the front.  This gentle graduation giving a balance of heights and ensure that as much of the planting within the border is visible at any one time. Plants are located in single colour drifts to give an enhanced effect and the large clumps do not disappoint, contrasting dramatically with each other.

Preparing the Summer Borders


Preparation starts in February, when the gardens start to grow seeds of annuals in the onsite greenhouse. The taller and more vigorous plants are potted on in the spring.

In late April/may the borders are marked out with sand to the design and labelled ready for planting. Planting takes place on a single day in may with an army of volunteers and gardeners.  Taller plants are staked with hazel to prevent flopping.

Dead heading is carried out weekly from June onwards to ensure a long flowering season, and an eye is kept on pests and diseases. At the end of the season the borders are cleared.  The Dahlias are lifted and stored overwinter and a green manure (broad beans) are sown into the soil.


Annuals
Cineraria cirrus
Anithrhimum 'scarlet giant
Cleome
Cosmos
marigold
Salvia


Perenials & Herbaceous
Helichrysum
Eupaturium
Rudbeckia maxima
Rudbeckia. 'Toto gold'
Scabious
silphium
Veromastrum


For related articles click onto:


Sunday 20 July 2014

NYMANS GARDENS


Click here for the 'Seeds of Eaden' seed shop

Nymans formal gardens cover approximately 33 acres and is set on the side of a valley partly sheltered by the woods of the Sussex Weald.  The garden is laid out in a series of rooms connected by stone steps or grassy slopes.  The rooms are separated by hedges, walls or trees which provide shelter for the rare and exotic plants for which the garden is renowned.


These picturesque English country gardens include the fabulous June and summer borders, walled garden, rose garden, summer borders, exotic borders, sunk garden, African bed, rock garden, pinetum, wild garden and arboretum.

The walled garden houses the June and summer borders as well as some of the most significant shrubs and trees.  The June borders borders flank each side of the pathway and are planted up perennial and herbaceous plants.  The colour scheme is light and muted in direct contrast to the summer borders just beyond the topiary yews.

The summer borders are a riot of colour.  Planted in four tiers there is a graduation of heights from front to back, with approximately half of the planting being annual bedding.  The planting combinations contrast colourfully with each other and the borders are ablaze with colour.   These really are an outstanding feature of Nymans gardens.


The rose garden is beautiful and full of scent.  Climbing rises sprawl over archways and beds are planted with light pink and white hybrid teas, moss and species roses. The rose garden used to be controlled organically for pests and diseases but this has been stopped in the last few years and the uses of chemicals to control rust, mildew and aphids is once again used.  A few years ago some roses were replaced with David Austin English roses in order to extend the flowering season but these newcomers are struggling so there is an ongoing programme to bring back the traditional roses.

The exotic border is located next to the ruins of the old house that was destroyed by fire in 1947.  The ruin walls provide a micro climate that protects plants from the cold.  Hardy bananas are left out unprotected along with the cycas palms, although it is recognised that this can only be so in mild winters. This border was refurbished in 2010 and unfortunately some of the planting has not survived. Today it looks at little messy with non exotic planting starting to creep into the bed.

The Pinetum was the first major project carried out by Ludwig Messel. Located behind the house it hugs the boundary of the circular wild flower meadow.  The trees are now of considerable size and maturity, and the pinetum evokes Ludwig Messels' plant collecting passion more than any other garden area.  Of course he would never have seen the pinetum as the mature garden we view today.

Beyond the pinetum is the arboretum, which then leads onto the woodland.  The arboretum houses many significant trees collected from plant expeditions including Nyssa sylcatica (Tupelo), Liquidamber Stryracifolia (Sweet Gum) and Tilia Americana (American lime). The woodland is dominated by camellias, rhododendrons and azaleas, and trees are under planted with spring bulb.


The sunk garden was created in 2010, primarily as a backdrop for wedding which are now performed in the beautiful loggia.  Located within view of the Gothic ruins the grass sinks gently in a perfect circle, which at its centre has a large Byzantine pot and quartile beds planted with perennial plants. Standard roses, Italian cypresses and Taxus columns also enclose the garden.

Just along from the sunk garden is the new south African bed.  I think this is a great edition to the gardens, and brings back the spirit of the gardens through experimental plant collections.These beds were previously a wild garden but were redesigned as they had become very overgrown.  Today fantastic South African plants such as Kniphofia (red hot pokers), Berkheya purpurea ‘Zulu Warrior’ and grasses such as Eragrostis curvula and Elegia tectorum punctuate the beds.  The planting is deliberately low to make the most of the views behind them of the Sussex Weald.  The farmland is part of the Nymans estate and is now leased to tenant farmers. There are plans to reintroduce the kitchen garden in the near future, which will include restoration of the original glasshouses.


Next to the sunk garden is the rock garden, which has recently been replanted with smaller alpines.  This original planting was covering the rocks and so the area has been redesigned with smaller planting. Unfortunately the planting does seem very sparse at the moment and the effect is a little lost.

A wisteria covered pergola walkway takes you up to the wild garden, which is located across a busy road. In this area large specimen trees dominate the gardens, whilst the planting around is left to establish itself with minimum interference.  Mown paths allow you to travel around the gardens and admire some of the rarest trees on site.


Friday 18 July 2014

NYMANS GARDENS: HISTORY


Click here for the 'Seeds of Eaden' seed shop

Located in the beautiful Sussex Weald Nymans gardens is a gem of a garden.  Currently owned by the National Trust the Nymans estate consists of over 600 acres.  This includes 300 acres of farmland, 275 acres of woodland  and 33 acres of formal gardens.


The Nymans estate was bought by the wealthy German born banker Ludwig Messel in 1890 with the intention of making a dream country house. Together with his head gardener James Comber, Ludwig created a magnificent plants man garden. Of course it helped that James' son Harold Comber was a famous plant hunter and and that Ludwig was so incredibly wealthy that he could afford to fashion the garden with exotic and usual plants collected from plant expeditions from around the world.

They created an outstanding garden with experimental designs and plants from around the world. The gardens were created around the plant expeditions of Kingdom-ward, Forrest, Wilson, Comber and Rock and includes many plants from China, Nepal, Tasmania, Chile, South Africa and New Zealand.

The gardens and house were developed by three generations of the Messel family from 1890s until 1953, when it was donated to the National Trust. In 1947 when the house was tragically destroyed by fire.  The Gothic ruins were left and planted up with clematis, roses and wisteria and now add to the romantic garden style of Nymans.


During the hurricane of 1987 nearly 500 trees were lost in one night.  This caused a big difference in the light levels to the beds and from this disaster came an opportunity to review the planting.  Many areas were redeveloped after this event and the gardens continue to evolve today.


Nymans formal gardens cover approximately 33 acres and is set on the side of a valley partly sheltered by the woods of the Sussex Weald.  The garden is laid out in a series of rooms connected by stone steps or grassy slopes.  The rooms are separated by hedges, walls or trees which provide shelter for the rare and exotic plants for which the garden is renowned.


These picturesque English country gardens include the fabulous June and summer borders, walled garden, rose garden, summer borders, exotic borders, sunk garden, African bed, rock garden, pinetum, wild garden and arboretum.


Wednesday 9 July 2014

GREEN MANURE: BROAD BEANS


Green manures are crops that can be grown in your beds that help to provide the soil with additional nutrients in a similar way to adding a manure.  This means that you can reduce your use of chemical fertilisers and garden organically.


Green manures are particularly effective in a beds where tender plants are removed in the autumn and planting commences again in the spring.  Herbaceous borders, summer bedding, vegetable plots or sub tropical borders could benefit from the use of a green manure.  

Green manures are also useful when beds that remain unplanted for some time as the presence of the crop not only add nutrients to the soil but also keeps the beds weed free. The plants are sown when the beds are emptied in the autumn and the entire plant (including the roots) is dug in at the end of the winter prior to planting in the spring.

Broad beans are very particularly effective green manure as they have an additional benefit. They have nodules on their roots caused by a bacteria in the soil that helps them to fix nitrogen from the air into the soil, and therefore increase nitrogen levels in the soil.  This nitrogen fixing benefits successive plantings considerably as nitrogen is an essential nutrient for leaf growth.


Sow your green manure of broad beans directly into the soil during autumn (October/November) after you have stripped out your summer planting.  Prepare the soil by forking over the soil deeply and removing any plant material from the previous planting. 

Broad beans like to be planted in slightly firm soil so tread over the bed prior to planting. Sow the seeds 9 inches apart and 2 inches deep and water well.  Your beans should germinate within 2-4 weeks. Keep the bed clear of weeds until the beans establish and water if necessary.

A month before you plant out your beds with summer plants chop the border over and leave the plants to wilt before digging over the bed to incorporate the entire plant  into the top 10 inches of soil.  Allow at least two weeks before planting to allow the beans to break down as decomposing green material will slow down your new plants.

For related articles click onto:
Aphids
Can you keep bees in your garden?
Differences between vegetables and fruit
Drainage
Feeding plants
Green manure: Broad beans
How do I attract bees into my garden?
How to grow peas
How to grow seeds indoors
How to make compost
How to propagate using division
How to propagate by grafting
How to propagate from seed
Manuring
Preparing a seed bed
Potagers
Soil structure
Watering plants
What is a potager?
What is a vegetable?
What is the difference between a marrow and a courgette?
What is the difference between a peach and a nectarine?
What is the difference between a squash, pumpkin and a gourd?
What is the difference between a turnip and a swede?
What is the difference between a yam and a sweet potato?
What is the difference between a vegetable and a fruit?
What is green manure?


Friday 4 July 2014

HOW TO GROW DAHLIAS


Click here for the 'Seeds of Eaden' seed shop

Who can resist growing Dahlias in your garden when there are so many varieties and colours to choose from. They are a firm favourite of mine, and add impact to any garden. They make excellent cut flowers and some blooms are as big as your head. 


Dahlias come in a variety of forms, having been cultivated for hundreds of years. Dahlias originated as species types and single blooms, but then were cultivated to produce hybrids such as double and semi double forms. These were then followed by pompon, collerette and cactus style blooms. Today there are 14 recognised Dahlia groups; singled flowered, anemone flowered, collerette, waterlily, decorative, ball, pompon, cacti, semi-cacti, miscellaneous, fimbricated, star, double orchid and paeony flowered dahlias. 

Favourite varieties of mine include 'Bishop of Llandaff' for its zingy pillar box red semi double flowers on dark black-red foliage and stems. 'Claire de Lune' is a pale yellow collerette form which has two rows of petals; an outside row of large rounded petals and an internal row of shorter petals, and fresh green foliage. 'Moonfire' has bronze foliage and single yellow flowers that are red around the central disc. 'Honka' is a yellow star flowering type with petals rolled inwards along their length. The rich orange double blooms of 'David Howard' contrast with its dark purple foliage.

You can plant out Dahlia tubers directly into the soil after the risk of frosts have passed, usually from April onwards. Alternatively you can pot tubers up from February onwards and keep the emerging plants in a frost free location until they are ready to plant out in the garden in late spring. 

It is recommended to pinch out the growing tops of the plant as it grows to encourage bushy plants. In addition you need to remove all but five shoots from the tuber to ensure strong and vigorous growth. I find that some varieties are more prone to bush out themselves then others. My much loved Dahlia Bishop of Llandaff is never pinched out or staked and is naturally bushy with prolific flowers, although it is planted in a sheltered position. 

Feed regularly during the growing season with a liquid feed fortnightly. Water well especially during dry spells, about once a week should be sufficient. Your Dahlias may require stalking, especially if you are growing stems for cut flowers of the taller blooms. Use a bamboo cane to secure the stems and tie in every few weeks to prevent your Dahlias from breaking at the base in windy or rainy weather. 


Dead head blooms monthly to prolong flowering. Check regularly for pests and disease. Earwigs like Dahlias especially, so you can either use an insecticide or hang pots filled with straw on canes amongst your dahlias. This will encourage earwigs to seek out the cool pots in the heat of the day so that you can remove them. Slugs can also cause problems especially on new growth so protect with slug pellets or use an organic control such as beer traps. 

Dahlias are tender plants and so will die if hit by frosts. In order to prevent this damage tubers are dug up in the autumn and stored ready to be planted out again in the spring. Wait until the Dahlia foliage has blackened from the frost (usually November) and trim the foliage to 15 cm high. Dig up your tubers and remove any loose soil but do not clean them too vigorously as you require some soil to keep the tubers together. 


It is essential that the tubers are kept dry or they will rot so do not get the tubers wet. However, it is also important not to let the tubers dry out completely. Hang them upside down for three weeks. You can dust the tubers with yellow sulphur to prevent mildew and fungus. Transfer the tubers to a box covered in a shallow layer of moist sand or peat, sitting the tubers on top of the soil. Cover with a layer of compost until just the stems showing and store in a cool frost free place. In late winter you can place the box in a light place and new shoots will emerge a few weeks later. 

I live on the milder south coast of the UK and so experience milder winters than the rest of the UK. I do not dig up my tuber each year but instead apply a thick layer of mulch (often leaf mould) over the bed. I also plant the tubers slightly deeper to add some protection. This method will see the new Dahlia plants emerge in the spring successfully in all but the hardest of winters, and the plants will establish much quicker than pot grown or bed sown tubers. But each year I accept the risk that my Dahlias may not survive if the weather is too cold but that’s the price I pay for low maintenance gardening.

For related articles click onto:
Can you keep bees in your garden?
Feeding plants
Green manure: Broad beans
Herbaceous borders
How do I attract bees into my garden?
How to build a cold frame
How to grow Dahlias
How to plant Dahlia tubers
How to grow orchids
How to make compost
How to grow geraniums
How to grow tulips
How to propagate using division
How to propagate by grafting
How to propagate from seed
Manuring
Plants for free
Preparing a seed bed
Potagers
Watering plants
What is a potager?
Thinning and transplanting

HOW TO PROPAGATE BY GRAFTING


Click here for the 'Seeds of Eaden' seed shop

Grafting is the connection of genetic material from one plant to another so that they fuse together and grow to become a single plant.  You can graft a shoot of a plant onto the root stock of another plant in order to create a plant that has the superior qualities of both parent plants. 

The top part of a graft produces the branches, leaves, flowers and fruit and is known as the scion. The lower part produces the root system and the bottom of the trunk and is known as the root stock. The scar where the two are joined is called the union.

For successful grafting to take place the vascular cambium tissues of the scion and root stock must be placed in contact with each other. Joints formed by grafting are not as strong as naturally formed joints as only the newly formed tissues join together.  The existing wood of the stock plant does not fuse, resulting in grafting joins becoming a weak point on the new plant.

Ornamental shrubs and trees are commonly grafted because it is difficult to propagate by other means. It is also favoured commercially as a larger flowering plant can be produced in a shorter period of time. Most plants need to be grafted within their own species but sometimes it is possible to graft within a genus.  A few plants can be successfully grafted onto different species, providing they are within the same family.

How to propagate by grafting 

Grafting of ornamental shrubs is often carried out in early spring before the sap starts to rise, although it can also be done in autumn. Select your scion wood from healthy one to two year old wood and your root stock from seedlings about two years old that are the thickness of a pencil. 

Because you are cutting into the vascular system of each you plant you need to ensure that your knife is sharp and kept well sterilised in order to prevent spreading diseases. It is essential to make straight cuts to ensure that the root stock and scion fit snugly.

With a sharp knife cut the scion wood just above a bud into 15-25 cm lengths.  
Cut the root stock down to 7.5 cm high and make a downward nick about 3 cm below the top.  Make a downward sloping cut from the top of the root stock to meet the first cut, and then remove the slither of wood.


Make a cut along one side of the scion wood the same length as on the root stock.  Make a short angled cut at the base. 

Fit the base of the sion wood into the root stock so that the cambium green layer beneath the bark meet, preferably on both sides of the stem. Wrap the union with grafting tape to hold the union until it fuses. You can place the graft in a  propagator or greenhouse.  Water sparingly but mist the plant regularly until it establishes.  The new graft should start to show growth in about six to eight weeks.


For related articles click onto:
Drainage
Feeding plants
How do seedless fruits propagate
How to build a cold frame
How to make compost
How to propagate using division
How to propagate by grafting
How to propagate from seed
Manuring
Plants for free
Preparing a seed bed
Soil structure
Watering plants
Thinning and transplanting
Plants for Autumn
Pruning trees and hedges
Rose pest and diseases
Training fruit trees
What is green manure?
What are rootstocks?